Recessed lighting is not only a practical lighting solution but also an art form that can enhance the ambiance of any space. At Handybros Online, we understand the importance of selecting the right mix of lighting to create a visually appealing and functional environment. In this comprehensive guide, we will walk you through the best tips about installing recessed lights correctly, ensuring that you achieve optimal results.
1. Determining the Total Wattage
Let’s explain how to determine the total wattage based on the room area, taking into account the different levels of brightness required for different rooms.
- Start by measuring the length and width of the room in feet.
- Multiply the length by the width to calculate the total area of the room in square feet.
- Refer to the table below, which provides different levels of brightness for various room types:
| Room | Lumen per square foot |
| Living Room | 10 to 20 |
| Kitchen: General | 30 to 40 |
| Kitchen: Stove | 70 to 80 |
| Kitchen: Sink | 70 to 80 |
| Dining Room | 30 to 40 |
| Bedroom | 10 to 20 |
| Hallway | 5 to 10 |
| Bathroom | 70-80 |
Determine the desired level of brightness for your room based on its function and refer to the corresponding range of lumens per square foot from the table.
Multiply the total area of the room by the chosen range of lumens per square foot to calculate the total lumens needed. This will give you an estimate of the required brightness for the room.
For example, let’s say you have a living room with a length of 15 feet and a width of 12 feet. The total area of the room is 180 square feet. Based on the table, a living room typically requires 10-20 lumens per square foot.
To calculate the total wattage, you would multiply the area (180 sq. ft.) by the range of lumens per square foot (10-20). This will give you a range of total lumens needed for the room. To convert lumens to watts, you can use the average efficacy of the light source you intend to use (Table below). For example, if you are using LED bulbs with an efficacy of 60 lumens per watt, you can divide the total lumens by 60 to get the approximate total wattage needed.
| Lumens | Incandescent Watts | Halogen Watts | LED Watts |
| 100 | 7 | 6 | 2 |
| 375 | 25 | 20 | 4 |
| 450 | 30 | 25 | 5 |
| 800 | 60 | 45 | 9 |
| 1100 | 75 | 60 | 12 |
| 1600 | 100 | 90 | 17 |
| 2600 | 150 | 145 | 27 |
| 3000 | 200 | 175 | 32 |
It’s important to note that the range provided in the table is a general guideline, and additional factors such as room color, natural lighting, and personal preferences may influence the actual wattage needed. Consult the specific light fixture or bulb manufacturer’s recommendations for more accurate calculations based on their product specifications.
By considering the room area and the corresponding range of lumens per square foot for different room types, you can determine the total wattage needed to achieve the desired level of brightness in your space.

Tip: When installing recessed lights in your kitchen, it is recommended to use a combination of wide-angle downlights for ambient lighting and narrow-beam downlights for task lighting over your stove, sink, and counters.
2. Determining the Number of Fixtures
- Start with the total wattage needed to light the room, which you calculated using the formula mentioned earlier or by multiplying the total area by the range of lumens per square foot and dividing by the efficacy of the light source.
- Next, determine the wattage of the bulbs you plan to use in the fixtures. This information can usually be found on the packaging or in the specifications of the bulbs.
- Divide the total wattage by the wattage of the bulbs to calculate the approximate number of fixtures needed.
For example, let’s say you have determined that you need a total wattage of 600 watts to light your room. If you plan to use 60-watt bulbs (the average wattage of a can lightbulb), you would divide 600 watts by 60 watts per bulb. This gives you an estimate of needing 10 fixtures to achieve the desired lighting level.
Keep in mind that the number of fixtures needed is an approximation and may need adjustment based on the specific layout and requirements of your space. Consider factors such as the size and shape of the room, the desired distribution of light, and any areas that require more focused lighting.

By determining the number of fixtures based on the total wattage and the wattage of the bulbs, you can plan the appropriate quantity of fixtures to achieve the desired level of lighting in your room.
3. Achieving Even Spacing
While knowing the wattage and number of fixtures is crucial, evenly spacing the recessed lights is equally important.
To determine the distances between recessed lighting fixtures and the ceiling’s edge, a straightforward approach involves dividing the room equally. Suppose we need six lighting fixtures arranged in two columns along the width and three rows along the length of the room. We can divide the room into six smaller rectangles by equally dividing the width into two and the length into three, as illustrated below:

It’s all about calculating a and b using these formulas:
a=A/2r
Where:
- A-Surface Lenth and
- r- Number of rows of lighting fixtures
b=B/2c
Where:
- B-Surface width and
- c- Number of columns of lighting fixtures

4. The Benefits of Dimming Kits
When installing or upgrading recessed lighting, incorporating dimming kits is highly recommended. Dimmer switches provide flexibility and practicality in controlling the amount of light emitted, thereby saving energy and extending the lifespan of the bulbs.

5. Creating a Focal Point
To accentuate artwork or specific areas within a room, gimbal lights are an excellent choice. These fixtures offer the ability to rotate, revolve, and swivel, allowing you to direct the light precisely where you want it.


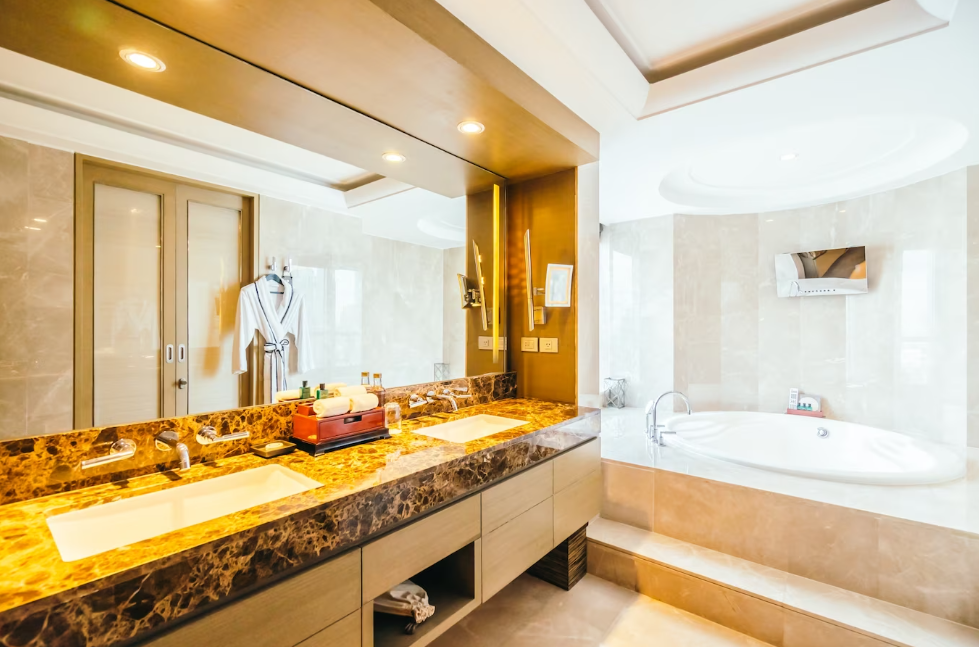
6. Mastering Bathroom Lighting
Achieving effective lighting in bathrooms can be a challenge. A combination of different lighting types often yields the best results. Recessed lighting works well for illuminating the vanity area. Consider using at least two gimbal downlights positioned close to the mirror, spacing them to overlap the light output from one another.

7. Conclusion
Congratulations! You are now equipped with the knowledge and insights necessary to install recessed lights flawlessly. By following the guidelines outlined in this comprehensive guide, you can create a beautifully lit space that will leave others in awe. Remember to prioritize safety and consult professionals when required. We invite you to share your own experiences and ideas on incorporating recessed lights in your home by leaving a comment below.
Read more: A Step by Step Guide to Installing Recessed Lights
We are confident that by implementing these recommendations and tips, you will transform your space into an elegantly lit haven. For further assistance or to explore more lighting solutions, do not hesitate to reach out to us at Handybros Online. We are here to help you every step of the way.